How Can You Proof Bread at Home?
Bread has been an integral part of our diet even before recorded history started five thousand years ago. There are few joyous things in life like making bread completely from scratch with your own hands. The miraculous yeast raises the bread which is called proofing the bread.
Yeast breaks down some of the sugar inside the dough to produce ethanol and carbon dioxide gas. The carbon dioxide gas wants to escape the dough but the gluten chain holds it inside. This is how the bread expands and doubles in size.
Proofing the bread is not a difficult task but you must be aware of various factors to make sure that the proofing happens properly. Your bread will lose not only texture but also its taste if it is not proven properly. Here I will discuss in detail all the things that you must be careful about while proofing your bread so that you get fluffy and soft bread every single time.
How to Prove Bread?
Proofing bread is the process by which you incorporate yeast into the dough mixture and let it rest so that it can double in size. Yeast is a living organism that converts sugar into ethanol, carbon dioxide, and energy.
The energy is used by the yeast to reproduce and stay alive. The ethanol evaporates completely as you bake the bread. The carbon dioxide gas expands the bread to give it a fluffy and airy texture.
This entire process of expanding the dough to give it the signature airy, fluffy, and soft texture of the bread is called the proofing process. I will discuss the entire process of how to proof bread so that you can be aware of all the factors when you bake your bread.
Proofing the Yeast
The first step which a lot of people skip is proofing the yeast. Instant yeast is dried-out yeast where a good portion of the yeast is inactive or dead. These yeast cells need to be reactivated before you start incorporating them into your bread.
Take a cup of water and warm it to 42 C or 107 F. Make sure that the water is not above that temperature. Hot water will kill the yeast and your bread will be ruined. Use room-temperature tap water if you do not have a thermometer.
Dissolve a teaspoon of granulated sugar in the water. Take one spoonful of yeast and mix it with the sugar mixture. Some yeast will float and refuse to dissolve in the water and it is completely fine. Yeast is not fully soluble in water. Cover the cup and leave it aside for 10-12 minutes.
The yeast is ready to be worked with if you see that bubbles are forming on top of the mixture. This is an indication that the yeast is working as intended and converting the sugar in the mixture to ethanol and carbon dioxide.

Kneading Properly
The next crucial step in making sure that your bread proofs properly is kneading the bread nicely. Kneading forms long gluten chains inside the dough that help trap the carbon dioxide gas that the yeast will be producing in the dough.
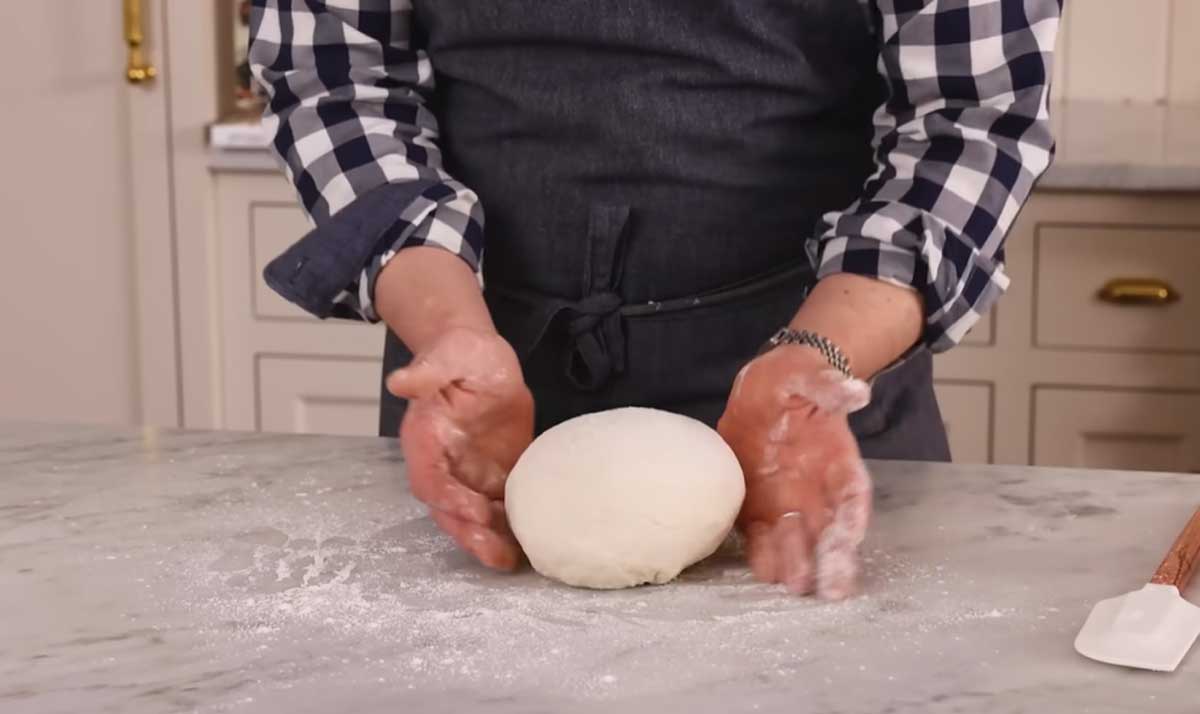
Initially, mix the flour and the yeast mixture with a wooden spatula to roughly form the dough. Next, turn the dough on a lightly floured countertop and start kneading the dough. The best and easiest kneading technique is first pushing down on the dough with the palm of your hand, taking the stretched part of the dough and folding it on the dough, rotating the dough slightly, and pushing down on the dough with the palm of your hand to repeat the cycle.
Keep kneading the dough continuously for 12-15 minutes. After you are done kneading the dough, it will turn smooth and will not have much stickiness to it. Now it is ready to be kept in a bowl for proofing.

Preparing the Bowl
The bowl where you will keep the dough for proofing needs to be coated with butter or oil. As the dough proofs and expands, it will release moisture and stick to the surface of the bowl. This is why I recommend that you coat the surface of the bowl with olive oil or butter. You should also rub olive oil on the dough as well as to prevent it from sticking to the lid.
Proofing the Bread
Keep the dough in the bowl and cover it with a damp cloth or a plate. Keep the dough aside for at least one hour or even longer until the dough expands and nearly doubles in size. It might take 60-90 minutes for the bread to proof. You can also proof it for a second time if you want to give it a more airy texture.

Proofing Environment and Factors
Understanding the proofing environment is crucial for preparing the best suitable conditions for proofing the bread. You must make sure that these factors are in your favor when you are proofing your dough.
Darkness
Direct light is a huge hindrance when it comes to proofing the bread. Always make sure that your dough is resting in a dark environment where direct sunlight cannot enter. Make sure to cover the bowl completely if you are using a glass or transparent bowl. Yeast is a creature of the dark and needs the absence of sunlight to function properly.
Temperature
The ideal temperature for proofing bread is 75 F to 78 F or 24 C to 25 C. The bread will proof at temperatures as high as 85 F or 30 C. Higher temperatures than that might kill the yeast. Yeast will take too long to work if the temperature is too low so try to make sure that the temperature is
Humidity
Humidity is also another factor that you should be wary of. Higher humidity makes it difficult for the bread to release the carbon dioxide gas and water vapor so try to keep the lid or damp cloth in a manner so that gas and vapor can escape but cannot get inside the bowl.
Time
Time is an important factor when it comes to proofing yeast. I usually wait at least 1 hour before checking on the dough to see if it has risen properly. You should always be patient when it comes to baking bread because proofing takes time.
Double Proofing
You can double-proof your bread as well. Double proofing means deflating the expanded dough after it has risen for an hour and resting it for some additional time so that it expands again. This is an excellent way to make sure that the bread has a wonderful soft, airy, and fluffy texture.
Proofing in an Oven
Proofing in the oven is an excellent solution if you live in a cold climate. The yeast will work very slowly if the temperature is too low. You can proof the dough in your oven instead. Make sure to put the oven at the lowest settings to ensure that the dough does not get cooked while it proofs. Try to make sure that the temperature of your oven does not exceed 104 F or 40 C because that might cook the bread.
Frequently Asked Questions
How Long Should I Proof My Bread?
You should proof your bread until it doubles in size. In ideal condition, it will take about 45 to 60 minutes and can take up to 90 minutes to 2 hours to proof your bread.
What Temperature Is Ideal for Proofing Bread?
75 F to 78 F or 24 C to 25 C is the ideal temperature for proofing bread.
Does the Type of Yeast Affect Proofing Time?
No, all bread yeast works the same way to break down sugar into carbon dioxide, energy, water vapor, and ethanol. The proofing time will be the same if your yeast is active and working properly.
How to Make Sure That the Yeast Is Active?
Dissolve the yeast in sugar water and wait to see if bubbles are forming on top of the mixture to make sure that the yeast is active.